Work order routing
Work Order Routing in Asset Essentials allows you to automate your work flow process for requests. It tells the system when and where to send work orders, whether approval is required, and allows for certain automated actions based on work order details. A work order will only follow a routing rule once it is saved if it meets all the criteria set in the rule. *Note: Approval routing is not yet fully supported in the Asset Essentials Mobile App. While you can see that the work order is awaiting approval, you cannot approve or deny the work order from the app. If you rely heavily on the app at your organization, please take this into consideration.
Creating a new route
- Click on the Admin menu icon, then click on Configurations.
- Choose the Work Order Routing option under the Work Order section.
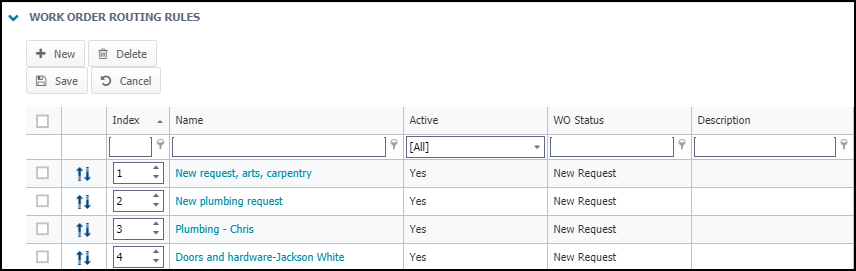
- This page will show any routes that have already been created. Click on the New button to create a new route. If you need to edit an existing route, right-click on it and select Edit. *Note: There can only be one route per site, however each route can contain multiple routing rules allowing for a variety of work flows per site.
General
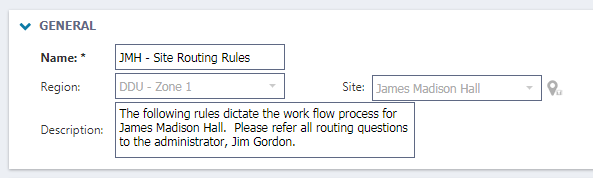
- Enter a Name for your Route.
- Select the Region or Site.
- Enter a Description if applicable.
- Click Save.
Routing rules
- Click the New button to open the Routing Rules pop-up window.
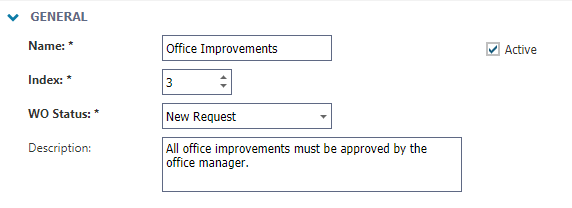
- Enter a Name for the routing rule.
- Select an Index number to represent where the rule falls in the list.
- Select the WO Status from the drop down this rule should apply to.
- Enter a more detailed Description, if needed.
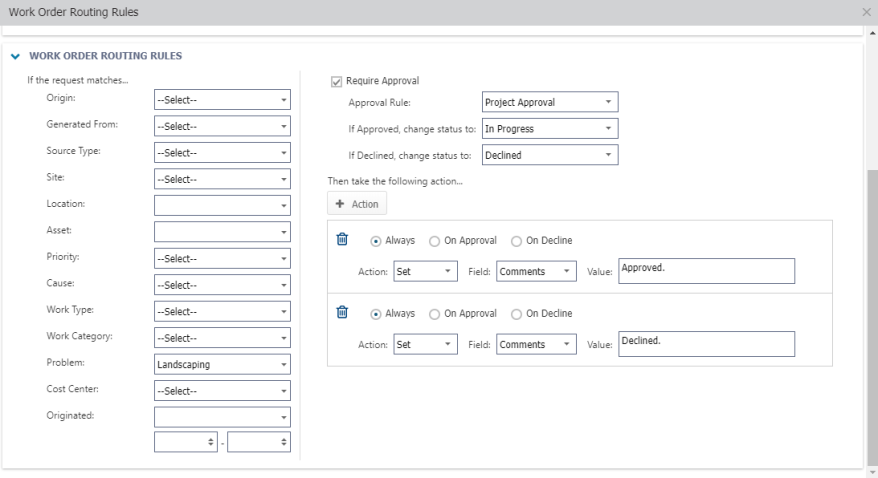
- In the Work Order Routing Rules section, use the drop-down menus to select the filters that will determine which requests this rule should apply to.
When creating a Location based route, be sure to consider the following:
- If you choose a sub-location to route by from the Location filter, you must also create an individual route for every other sub-location under the associated parent location. Work orders tied to a sub-location will only route successfully if there is a route set up for all sub-locations under the parent location.
- If you choose a parent location to route by from the Location filter, only work orders tied to that specific parent location will follow that route successfully. Work orders tied to a sub-location under the associated parent location will not follow that route successfully.
- Check the Require Approval box if the request needs to go through an approval process. *Note: Approval routing is not yet supported in the Asset Essentials Mobile App. If you rely heavily on the app at your organization, please take this into consideration.
- Select the Approval Rules from the drop down. Click the link to learn more about creating Approval Rules.
- Select the status the work order will be in if approved.
- Select the status the work order will be in if declined.
- Once you have selected the filters and set any approvals, click the Add Action button:
- Choose whether the action will Always happen when a work order follows this rule, will only happen On Approval, or will only happen On Decline.
- Add User - Add User allows you to choose who the work order should be assigned to.
- Responsible Users - Routes the work order to users listed as a responsible user for the Source Type (Asset, Location, Site, or Meter Title) selected on that work order.
- Specified Users - Routes the work order to the users you select in the field to the right.
- Users by Tag - Routes the work order to users that grouped together with a common tag.
- Set - The Set option allows you to choose an automated action for the request.
- Select a Field from the drop down menu, then enter the Value that field should be set to when the work order is routed. For example, you could choose a routing rule that automatically updates the Priority field to Critical.
- Click Save at the top of the Work Order Routing Rules window to add this routing rule to the system.
- If you need to add additional rules to the route, click on the New button under Work Order Routing Rules to add the next rule.
Managing work order routing rules
Editing work order routing rules
- Click the routing rule Name you need to edit.
- Adjust any necessary fields.
- Click Save.
Indexing work order routing rules
Once all routing rules have been added for a specific route, you can order the rules. This tells the system the order in which to apply the routing rules. For example, the first rule may send all In Progress work orders with a High priority to Technician A and the second rule may send all In Progress work orders to Technician B. This will ensure that the work orders that meet the criteria for the first rule are sent to Technician A, and the work orders that do not meet the criteria for the first rule are considered for the second rule.
- In the Work Order Routing Rules section, click Edit.
- Use the Drag to Change Index icon (
 ) or the Index field to adjust the order in which the routing rules are applied.
 - Click Save.